Fly Tying
with Clamps and Nippers
Fly tying with clamps and nippers allows beginners to start tying without the expense of a vise and tools, and allows travelers to tie without the weight of a vise or the need to pack tools.
Ever since the video of Katsutoshi Amano tying his signature fly without the aid of a vise, tenkara anglers have been interested in tying "in hand." John Geer and Matt Shipp have done public demonstrations of their techniques and Anthony Naples has written a couple blog posts about them.
This article examines a slightly
different method of tying without a vise. It is also without either a
bobbin holder or fly tying scissors, two things that tenkara anglers (and
western fly fishers) would not normally carry for a day on the stream.
Two tools they would carry, though, are clamps and nippers. I hope to show that fly tying with clamps and nippers is a viable alternative to tying in hand or with a full complement of vise and tools.
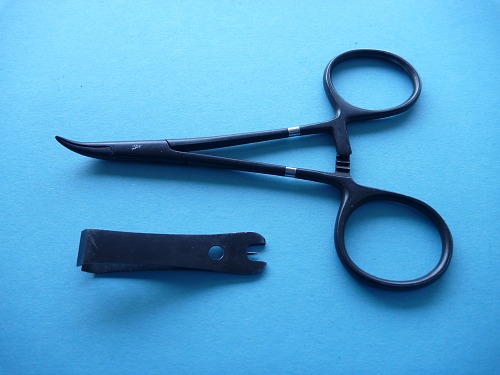 Fly Tying Tools?
Clamps, also called hemostats or forceps, allow you to remove a hook from a fish when you cannot reach it with your fingers. Nippers allow you to cut tippet and the tag ends from knots. Neither is mentioned in the rod-line-fly mantra, but both are highly recommended.
Years ago I tried tying flies with cheap, $5 hemostats and quickly abandoned the notion because they wouldn't hold a hook securely. Just recently I tried again, this time with a pair of the Dr. Slick Spring Creek Clamps. Eureka! They hold the hook well enough to tie flies!
Now I know John and Matt will tell you you don't need clamps. Amano san would probably just smile and say 必要ありません which is basically the same thing. Using clamps to hold the hook rather than pinching it between your thumb and forefinger offers two significant advantages: 1) it is easier to hold the hook securely, and 2) using clamps leaves your thumb and forefinger free for other tasks - such as holding materials in place as you tie them in, and preparing materials that you forgot to prepare ahead of time.
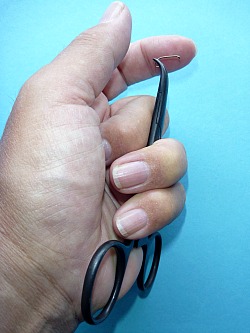
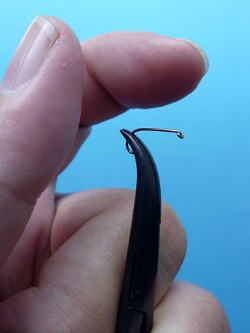
The photos above show the hand position for holding the clamps. Braced against the heel of your hand and pressed against the back of your middle finger, held in place by your ring finger and pinkie, the clamps are quite stable. Your thumb and forefinger are free.
Although other clamps may hold a hook well enough to tie flies, the shape of the Spring Creek Clamps allows you to completely cover the point of the hook while still giving good access to the entire hook shank. Inexperienced fly tyers wouldn't think a hook point can cut thread, but it can and does with the least bit of inattention. Keeping the hook point covered will save more than a few flies.
I've chosen three flies to illustrate the step-by-step sequence, although not all steps are shown for all flies.
It helps to prepare and lay out all materials before starting a fly. Although you can leave the thread on a spool, with a rubber band to keep it from unraveling, if you just cut off about 18" of thread to begin with the thread spool will never be in the way.
The comments are written for beginners, so many will seem quite obvious to experienced tyers.
Takayama Sakasa Kebari
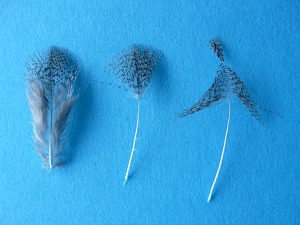
1. Start by preparing the feather. If you are using a partridge feather (shown here) strip off all the fuzz but be careful not to break the stem. Grasp the very tip of the feather and sweep back the feather barbs.
2. Put the hook in the clamps so the point is covered (if you are using the Spring Creek clamps). The hook shown is a size 12 Daiichi 1150, but any size 12 wet fly hook will work.
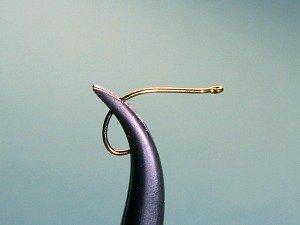
3. Hold the end of the thread between your thumb and forefinger and wrap in wide turns to the hook eye. Then make about 10 wraps back towards the bend.
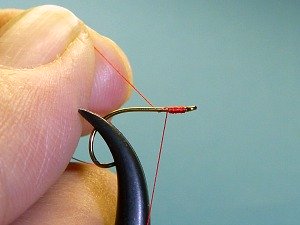
4. Between steps, keep tension on the thread by wrapping it once around your ring finger. I found it held better if I wrapped it counterclockwise and right at the last knuckle. At this point, your hand is now free to clip off the tag end of the thread with your nippers.
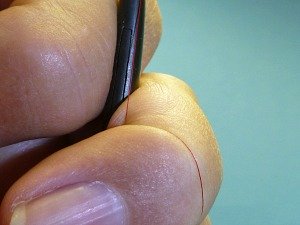
5. Hold the prepared feather right alongside the hook so the "V" between the tip and the swept back barbs is right over the thread (where you stopped wrapping). Your first wrap should move the feather from alongside the hook to roughly on top of the hook.
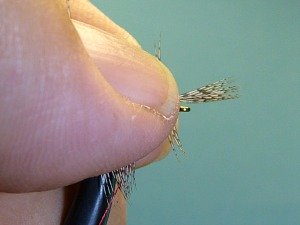
6. Make three or four more tight wraps to trap and hold the feather. Push the tip up with your fingernail to make it easy to clip with your nippers.
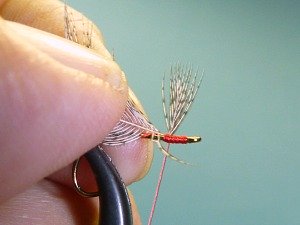
7. Wrap to the eye and back a couple times to build up a bit of a head. Then push the feather upright and make about three wraps on the hook bend side of the feather.
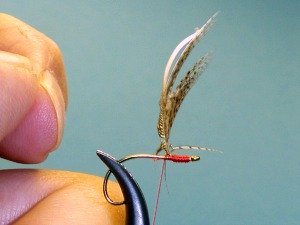
8. As you wrap the hackle, you can press your forefinger against it to hold it in place after each wrap so you can let go of the stem and then reposition your fingers (otherwise you have to twist the stem one turn clockwise for each wrap to offset the counterclockwise twist that is caused by the wrapping). Each wrap should be behind the previous one (towards the hook bend).
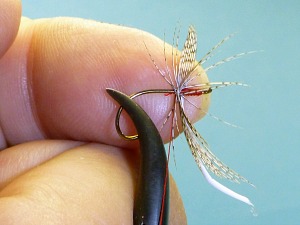
9. When you get to bare stem, hold it back away from the hackle so that you can trap it with thread wraps.
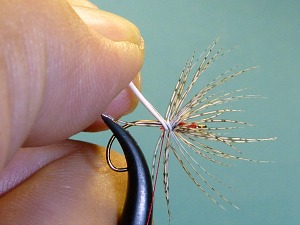
10. Trap the hackle stem with a few wraps and clip it off. Then hold a peacock herl against the hook shank and tie it in with several thread wraps.
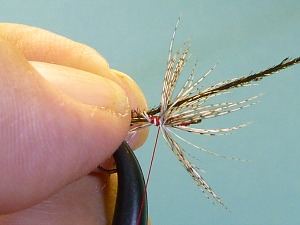
11. Wrap the peacock herl to make a bushy thorax.
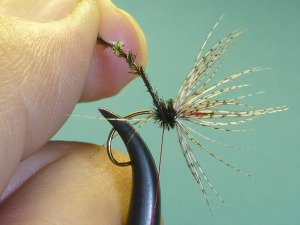
12. Trap the peacock herl with several thread wraps and clip or break the excess. Any stray hackle barbs can be clipped off as well.
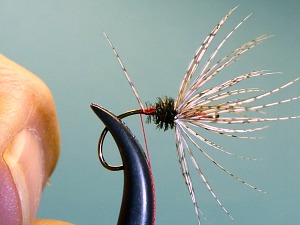
13. Wrap to the bend and back to the herl several times to build a body. Do a 4 turn whip finish at the bend. I should do a tutorial for beginners on how to do a whip finish by hand, but that is a project for another day. I am sure there are YouTube videos that will do in the interim.
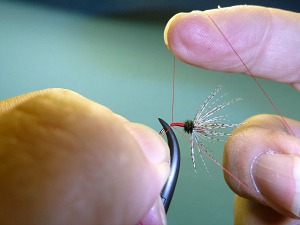
14. Clip the excess thread with your nippers. I am sure new, sharp nippers would have created a cleaner cut but I am also sure the fish don't care.
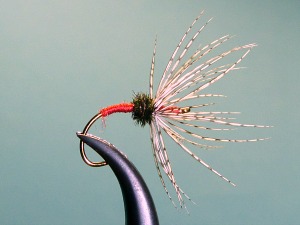
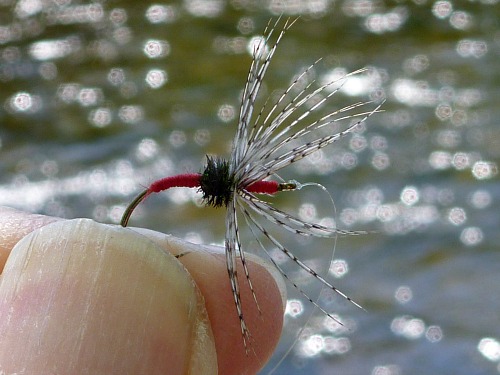
The exact same sequence of steps, with different thread and hackle and without the peacock herl, can be used to tie an Ishigaki Kebari or an Amano Kebari. The Amano Kebari is often tied on an eyeless hook, with the first step being tying on a loop of silk cord to act as an eye, but you can certainly just use an eyed hook if you wish.
Pink Chenille Worm
1. Cut a piece of chenille so that the length of the chenille is the same as the width of the card.
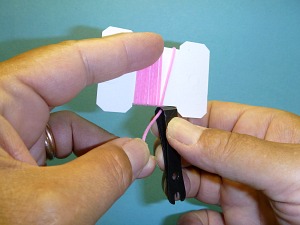
2. Place a small hook in the clamps. The hook shown is a Daiichi 1110 size 20.
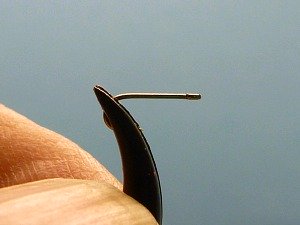
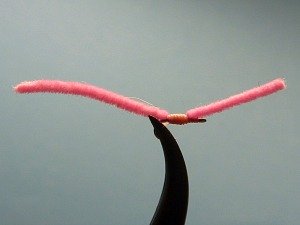
3. Start the thread with a couple widely spaced wraps to the hook eye, then wrap to the hook bend in touching turns. When you reach the bend, keep the thread under tension by taking one counterclockwise wrap around your ring finger. Clip the excess thread at the hook. Hold the chenille at the midpoint and tie it onto the hook with several wraps. You might have to pull it back up to the top of the hook shank after several wraps.
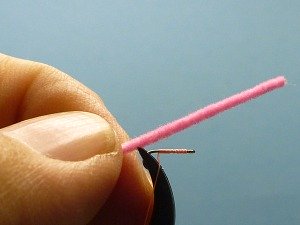
4. Continue wrapping until the tie-in point is about the same thickness as the chenille. Do not wrap all the way to the hook eye or you will not be able to thread tippet through the eye. Do a whip finish over your previous wraps.
Black Killer Bugger
1. The Black Killer Bugger is a fly that is easier to tie with clamps than it would be in hand. You need to cut some marabou, but after you cut it you don't want to put it down! The hook shown is a Daiichi 1560 size 12. Any 2XL nymph hook will work.
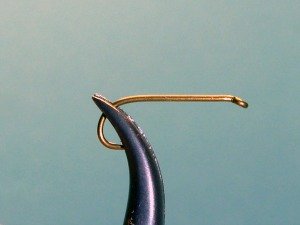
2. I would include a bottle of superglue with my materials. Copper wire can slip and a little bit of glue is good insurance.
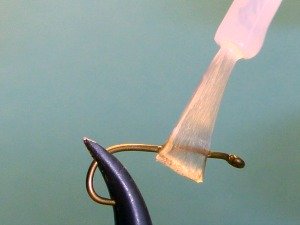
3. Start the wire with a couple widely spaced wraps to the hook eye and then touching turns (each wrap touching the previous one to create a smooth body) to about the middle of the hook shank.
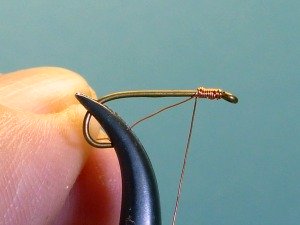
4. Clip a pinch of marabou from the side of the feather. Hold it on top of the hook shank so that the tail is just a bit longer than the hook shank. Do a pinch wrap with the copper wire to hold it. (Pinch the marabou with your thumb and forefinger. Bring the wire up between your thumb and the marabou, then down between your finger and the marabou and finally under the shank towards you and back up. Continue to pinch the marabou to hold it in place as you tighten the wire by pulling up.)
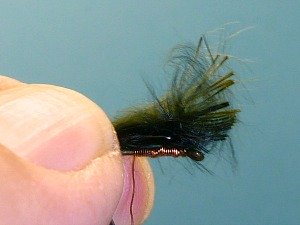
5. Wrap the the copper wire back to the bend, holding the marabou tail up to prevent it from sliding over to the far side of the hook.
When you get to the bend, keep the wire under tension by doing one counterclockwise wrap around your ring finger. Clip off the excess marabou from around the front of the hook.
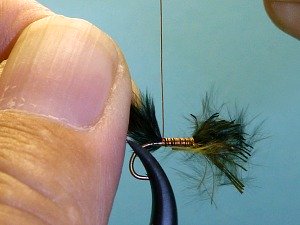
6. Start the yarn the same way as the wire, then wrap back towards the bend. When you get back to where the the wire is holding the marabou it is time to clip the tag end of the yarn. To do this you will need to keep the yarn under tension. Take one counterclockwise wrap around your pinkie. Now your hand is free to clip the yarn tag end.
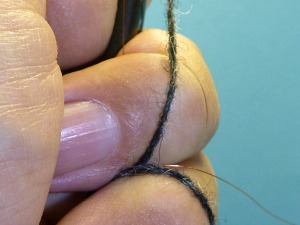
7. Free the yarn from your pinkie and wrap to the bend. Take one very wide wrap all the way to the hook eye, then wrap back to the bend again in touching turns. The taper of the body is largely caused by somewhat looser wraps around the front half of the hook and tighter wraps around the back half. In the photo, the free end of the yarn just happens to be directly behind the hook eye. It is not attached.
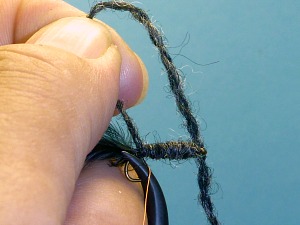
8. Holding the yarn up and out of the way, free the wire from your ring finger and take two wraps around the yarn to trap it. Do a four wrap whip finish with the wire (ideally with touching turns, towards the hook eye). Break off the excess wire.
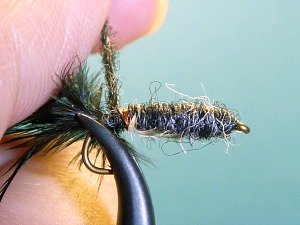
9. Clip off the excess yarn. Since you have superglue, you could touch it to the wire to insure it won't come undone, but I never do and always lose the fly before it comes undone.
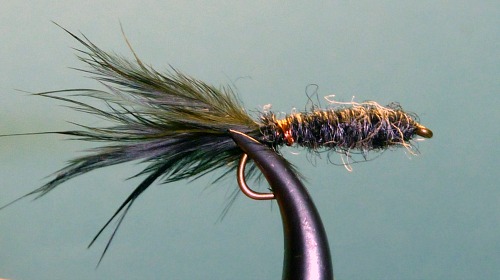
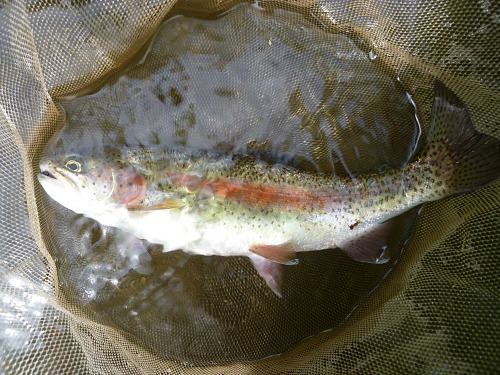
This rainbow was the fourth trout caught with the Black Killer Bugger shown in the sequence above.
The same tying sequence, with different yarn and without the marabou, can be used to tie a Killer Bug or Utah Killer Bug.
It is not uncommon for people to tell me that they want to start tying their own flies "someday." However, the uncertainty over what vise to buy and what tools they'll need keeps tends to keep "someday" from being "today."
The satisfaction you'll get from catching the first fish on a fly you tied yourself is really something. Fly tying is not hard, it's only hard to get started.
My goal for the Fly Tying with Clamps and Nippers page was to show that you can tie flies with no more equipment than you already have. (If you don't already have clamps and nippers you should!) Sure, you can tie in hand, but the clamps do make it easier to hold the hook, make it much easier to hold a small hook, and leave your thumb and forefinger free to hold materials or even prepare materials that you forgot to prepare in advance. The technique to hold the thread under tension and the use of your nippers means you don't even have to buy a bobbin or a pair of scissors to get started.
Fly tying with clamps and nippers is not going to produce flies that will win fly tying contests. It will produce flies that catch fish, though.
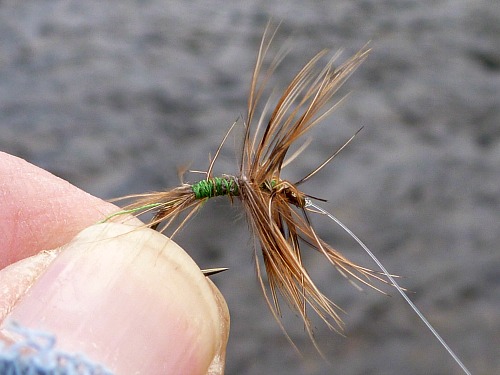 Early attempt at tying with clamps and nippers.
It's ugly, but it was effective.
The fly above is one I used on the day written up in my 6-21-15 trip report. It was not pretty. Crude, yes. Effective, you bet. It was one I had tied on the plane on the way to one of the Oni schools. I've now fished, and caught fish, with a number of flies tied without a vise as part of the TenkaraBum No Vise challenge. I am getting a whole new perspective on flies. They really, truly don't have to be beautifully tied or proportioned. Who knows what goes through the pea brain of a trout before it hits a fly? One thing is sure - they're not art critics.
Your first few flies, tied with clamps and nippers, probably will not be pretty. I have gotten to the point where I like the slightly disheveled, buggy look, and I now tie most of my flies without a vise.
If a standard dry or wet or sakasa kebari is tied perfectly, it is very easy for a trout to tell that it is not a real fly. If it is not neatly tied, though, if the wraps are not perfect and some (or much) of the hackle is out of place it's a lot harder to tell just what it is. It might not be food, but then again, it might be. The only way a fish can tell is to bite it.
Lots of fly fishermen will tell you that their flies get better after they've been chewed on a few times. No reason why they can't start out that way!
Of course, if you are a perfectionist, you can tie absolutely beautiful flies without a vise. It certainly isn't necessary, but it certainly is possible.
TenkaraBum Home > Fly Tying> Fly Tying with Clamps and Nippers
TenkaraBum Home > Horsehair Lines > Fly Tying with Clamps and Nippers
“The bitterness of poor quality remains long after the sweetness of low price is forgotten” - Benjamin Franklin
"Be sure in casting, that your fly fall first into the water, for if the line fall first, it scares or frightens the fish..." -
Col. Robert Venables 1662
As age slows my pace, I will become more like the heron.
We've all had situations where seriously chewed up flies kept catching fish after fish after fish. It is no sin to tie flies that come off the vise looking seriously chewed up.
Warning:
The hooks are sharp.
The coffee's hot.
The fish are slippery when wet.
Beware of the Dogma
Seriously, all the hooks sold on TenkaraBum.com, whether packaged as loose hooks or incorporated into flies, are dangerously sharp. Some have barbs, which make removal from skin, eyes or clothing difficult. Wear eye protection. Wear a broad-brimmed hat. If you fish with or around children, bend down all hook barbs and make sure the children wear eye protection and broad-brimmed hats. Be aware of your back cast so no one gets hooked.
Also, all the rods sold on TenkaraBum.com will conduct electricity. Do not, under any circumstances, fish during a thunder storm. Consider any fishing rod to be a lightning rod! Fishing rods can and do get hit by lightning!
What's in stock?
Suntech Tenkarakyo 40F Tenkara Rods
Daiwa Keiryu-X 39
Nissin Oni Tenkara Line
Coming Soon
January
Kurenai II AR 30F
Kurenai II AR 33F
Kurenai II AR 39F
Nissin Oni Line size 3
Nissin Oni Line size 3.5
TenkaraBum 33
TenkaraBum 36
TenkaraBum 40
Medium Rod Case
Furaibo TF39
Furaibo TF39TA
Latest Pages
Chris,
I wanted to send you a thank you for a few things; stocking the Daiwa Keiryu-X rods, your “one fly” fishing kits, and your inspiring blog post on tying with the Spring Creek clamps. I had such a blast tying those flies and a great time catching rainbows and browns on them too! What a great introduction to fly tying that is. As for the rod, it’s pretty rare that I have a vision of how something is supposed to work out and the reality matches up, but the 36 I bought feels like I hoped it would (a great nymphing rod).
Thanks for your passion for all things Tenkara and for sharing that with others.
Dan S, Colorado
Your page on tying with hemostats and nippers has allowed me to start tying my own flies where I otherwise would not have for months or years.
Hunter G, Utah
If you enjoy spin fishing or baitcasting please visit my sister site Finesse-Fishing.com.


